25 Simple Christmas Nail Designs That Look Elegant and Festive
If you are searching for the best Simple Christmas Nail Designs, this is your ultimate guide! The holiday season is usually hectic—we’re busy gift shopping, decorating, and, let’s be real, eating all the cookies! Who has time for a three-hour nail appointment? Not us. That’s why we’ve rounded up 25 gorgeous looks that deliver maximum festive impact with minimum effort. Some of these are super DIY-friendly, others are quick salon jobs. These looks hit all the marks: festive? Absolutely. Over the top? Definitely not. Get ready to upgrade your look effortlessly this December!
Table of Contents
- Subtle Polka Dot Nails
- Festive Light Blue Nails
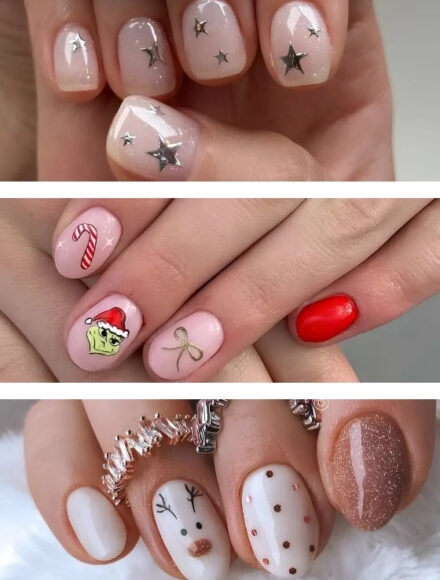
- Micro Christmas Nail Art
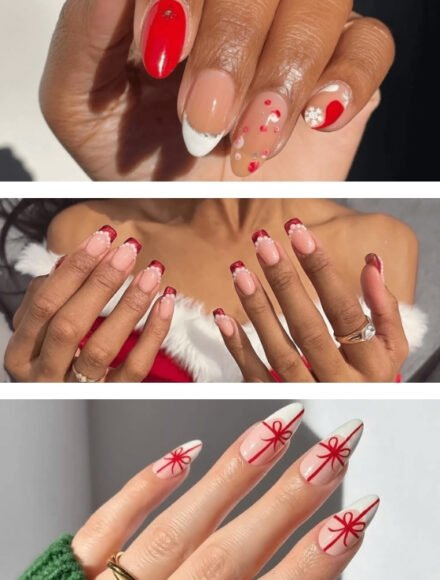
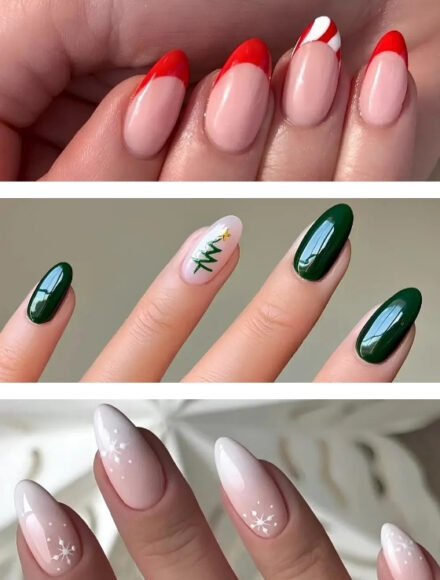
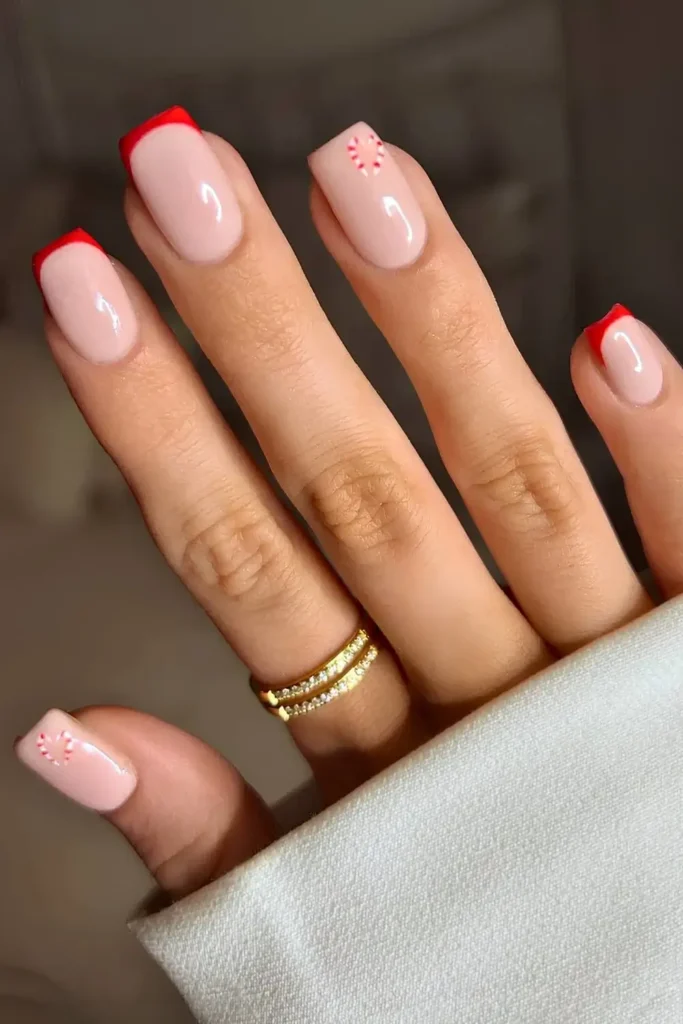
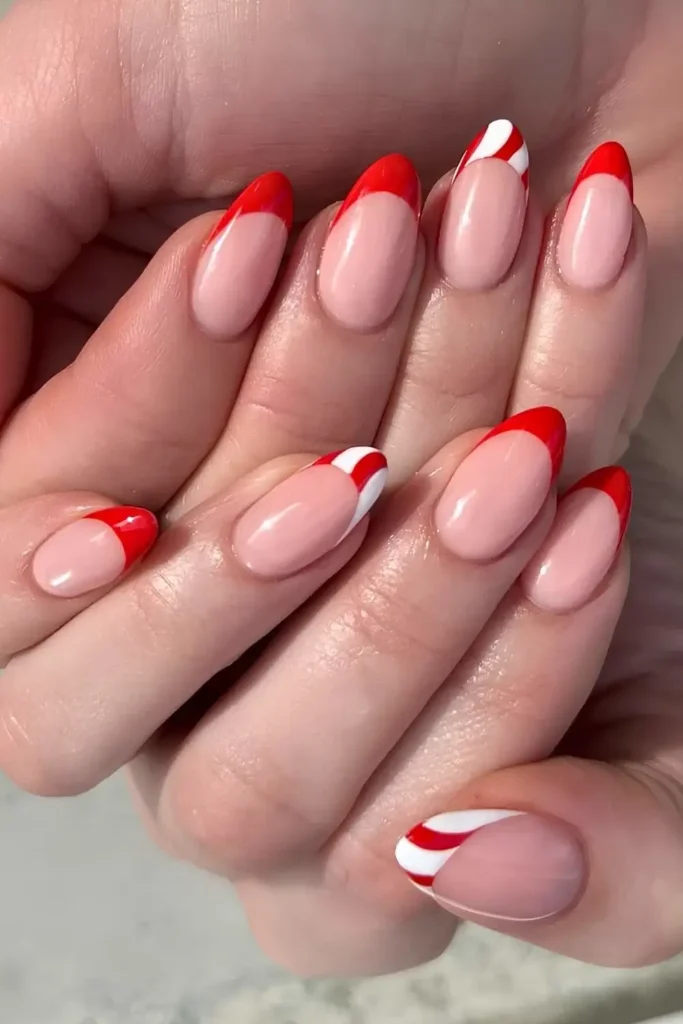
- Red French Tip Nails
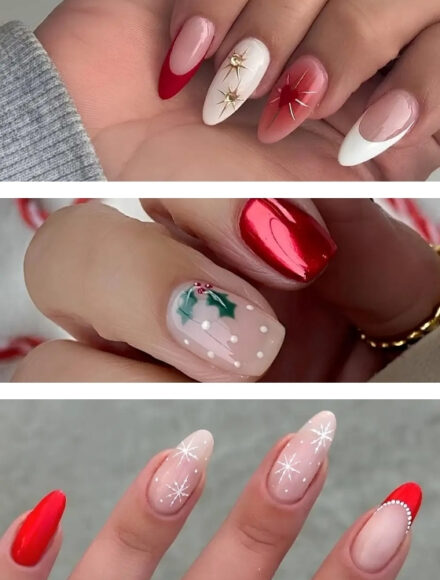
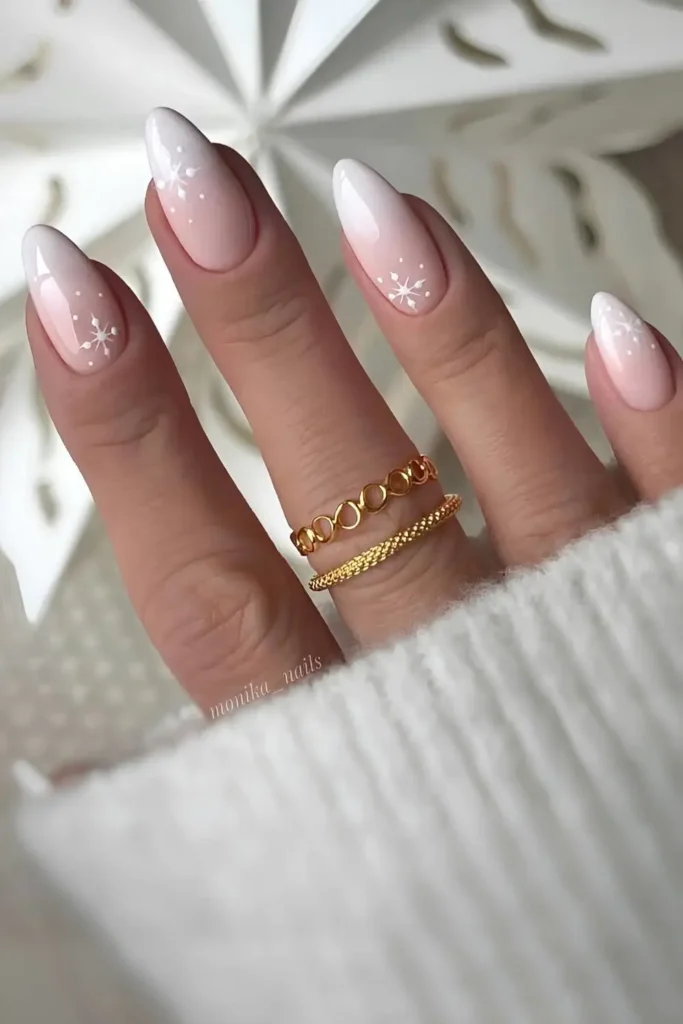
- Celestial-Inspired Nails
- Red Chrome Nails
- Zig-Zag Christmas Tree Art
- White Winter Manicure
- Candy Cane Heart Nails
- Shimmery Finish Nails
- Dusty Pink Nails
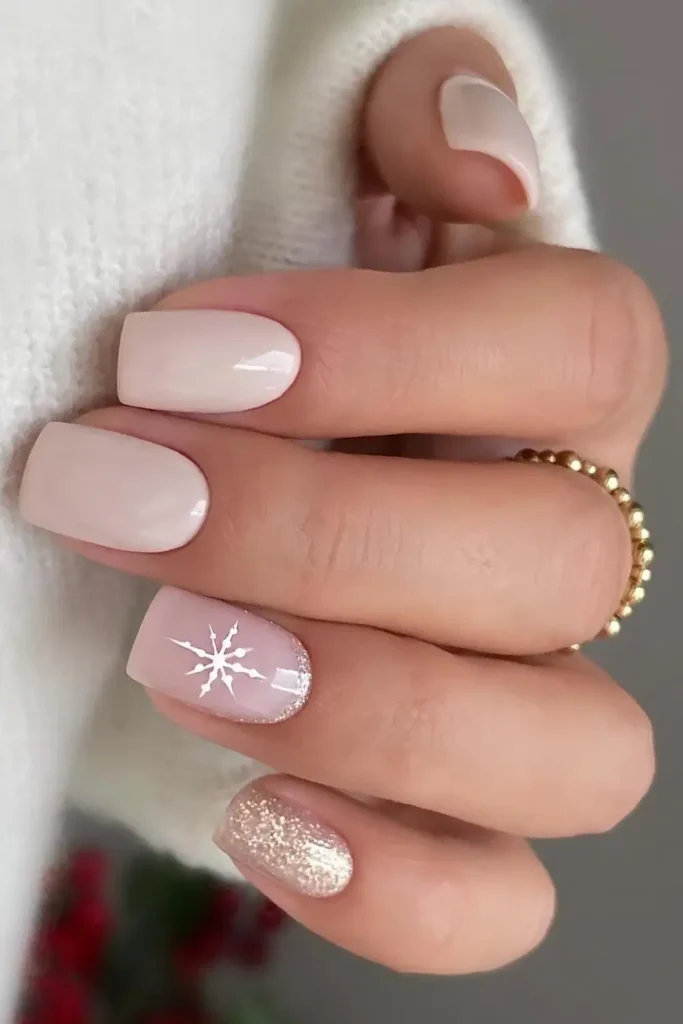
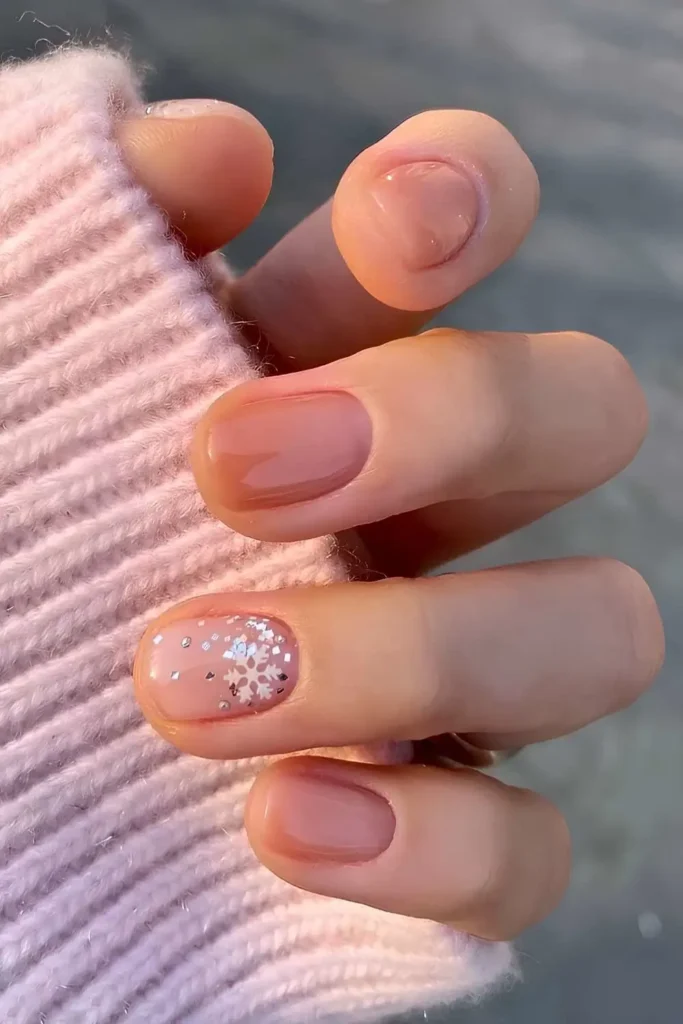
- Minimalist Snowflake Nails
- Silver Glitter French Tips
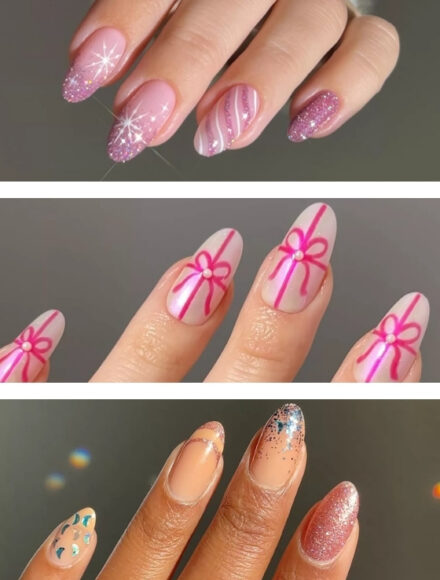
- Bow and Polka Dot Nails
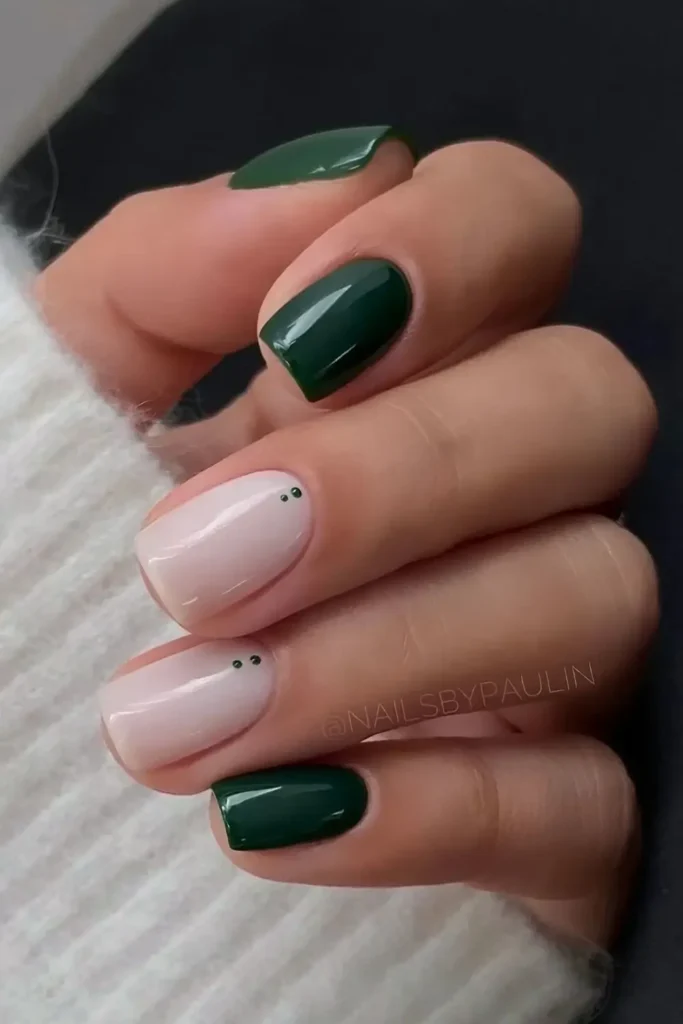
- Dark Green Nails
- Neutral-Tone Manicure
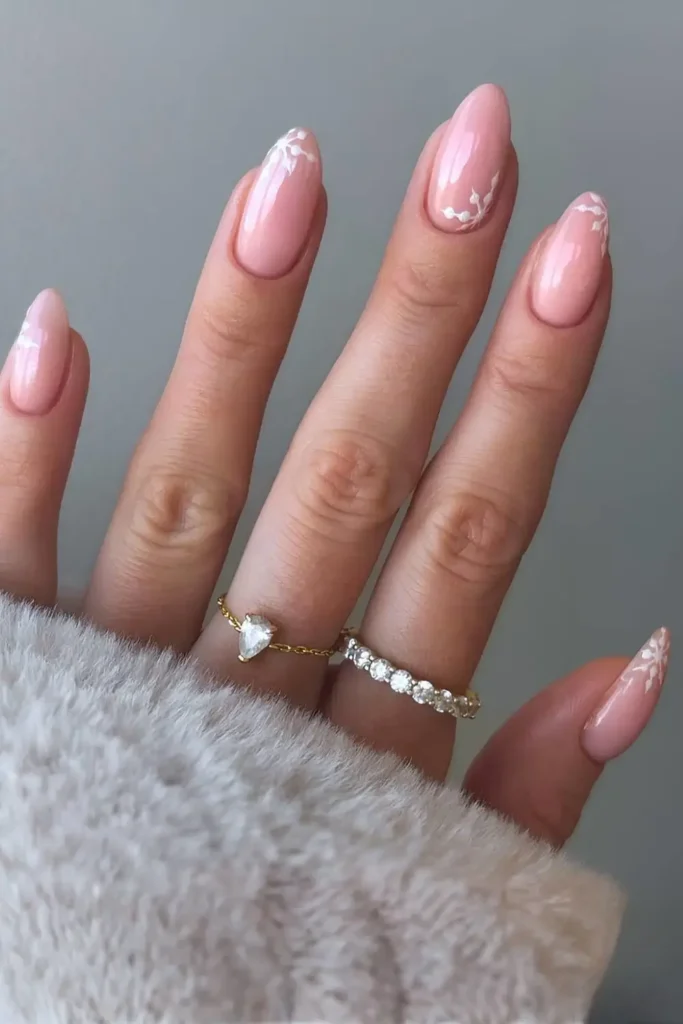
- Nude Christmas Nail Designs
- Holiday Ombre Nails
- Peppermint Swirl Nails
- Green and White Nails
- Chrome Line Art Nails
- Pink and White Nails
- Holiday Skittle Nail Set
- Red and Gold Nails
- Classic Black Manicure
Subtle Polka Dot Nails
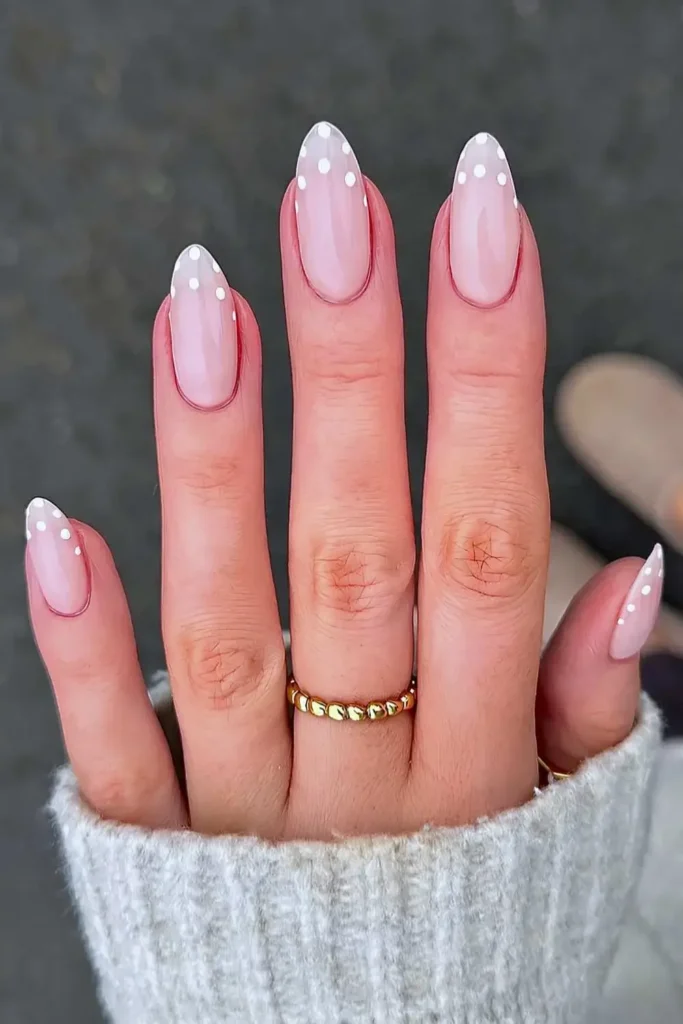
This look gives cozy winter vibes without turning your hands into a busy Christmas display. Use a sheer milky white base and place small, opaque white polka dots just at the tips. It’s understated, cute, and instantly done.
Festive Light Blue Nails
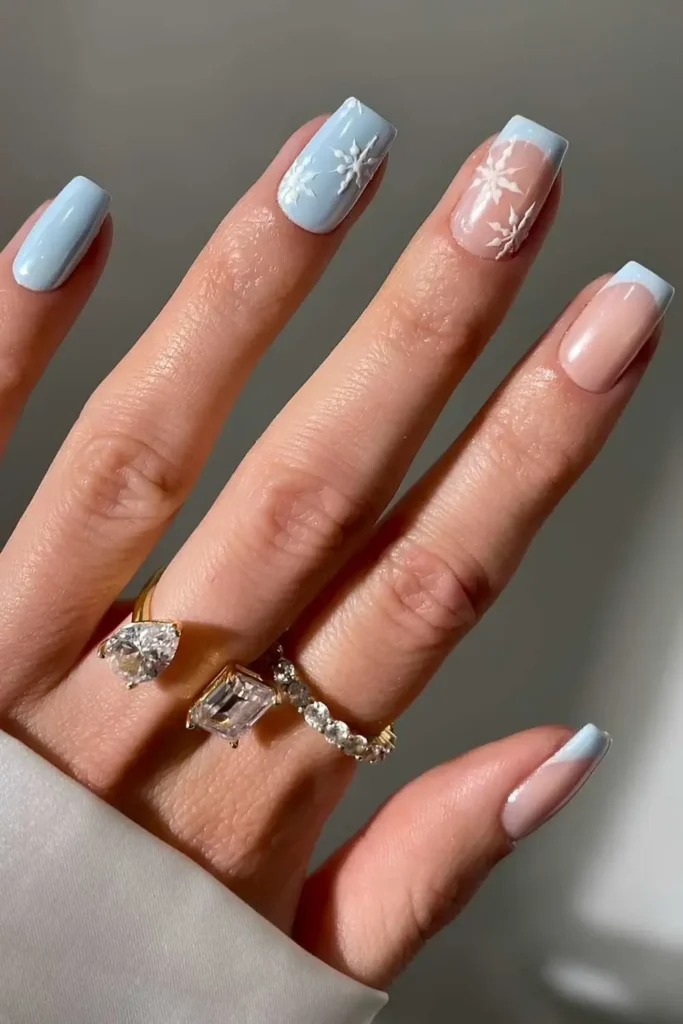
Light blue is such a soft, delicate winter color. Use it as your base, then toss a couple of simple white snowflakes on top. You stay firmly in the realm of simple Christmas nail designs while getting a beautiful, frosty glam moment.
Micro Christmas Nail Art
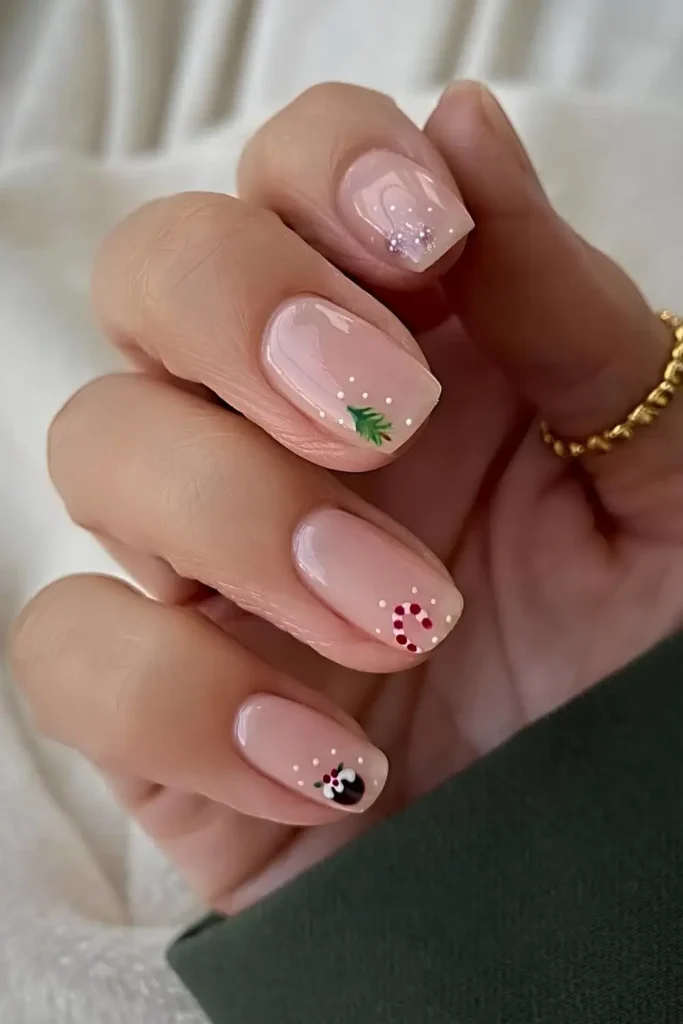
Want actual Christmas motifs but don’t want to be loud about it? Go micro with the art! Use a nude base, then add teeny tiny trees, candy canes, gingerbread doodles—whatever feels cute, as long as it’s mini.
Red French Tip Nails
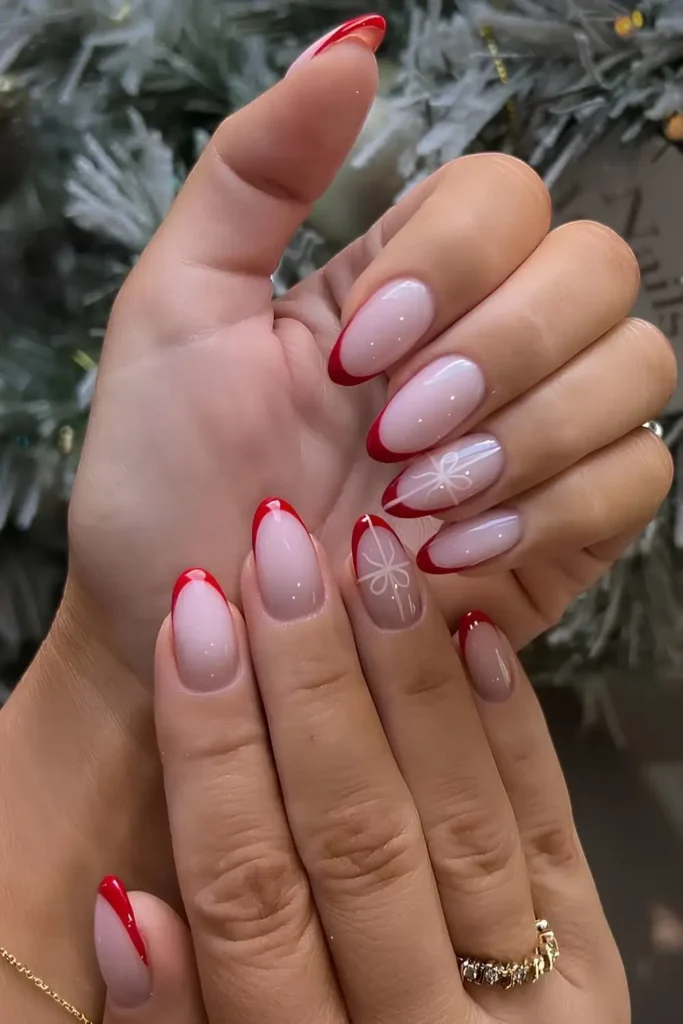
This is the ultimate quick and festive combo. Use a milky white base and add vibrant Red French Tips. Finish the look with a tiny little gift bow accent nail. It’s a simple red and white classic that’s sophisticated enough to carry you through the entire month of December.
Celestial-Inspired Nails
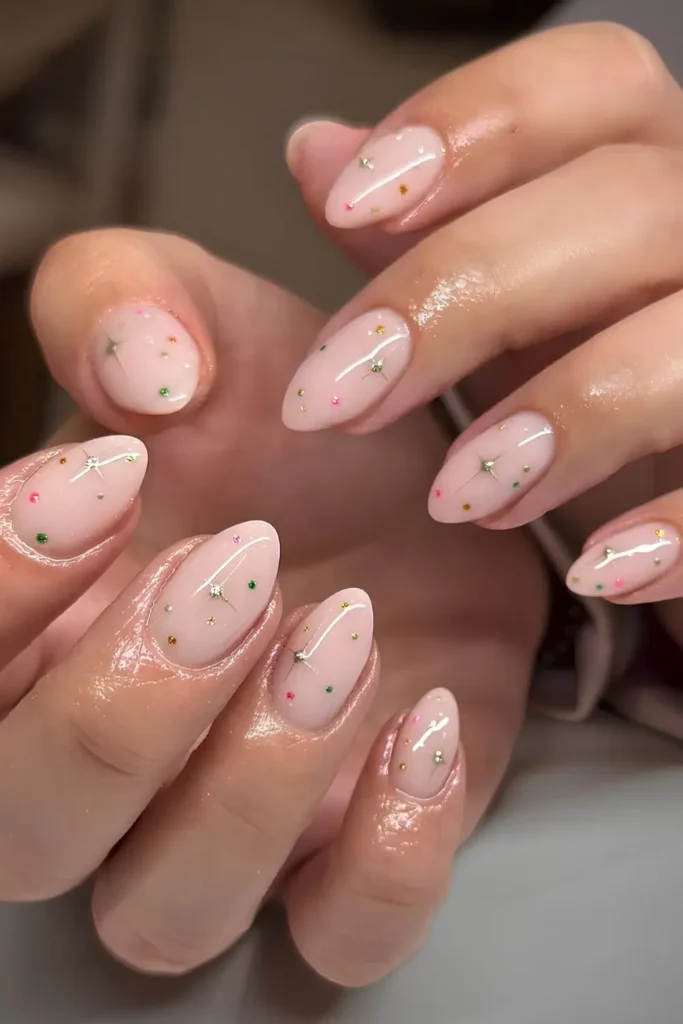
For those who want to acknowledge the holidays without making it their entire personality! Start with a soft neutral base, then scatter the tiniest gold stars and small colorful dots like delicate confetti. It’s dreamy, subtle, and beautifully elegant.
Red Chrome Nails

The best effort-to-impact ratio! Just apply your favorite red polish, then rub in some chrome powder. That’s it! It’s easy to do, works on any nail shape or length, and catches the light perfectly, making it look incredibly expensive.
Zig-Zag Christmas Tree Art
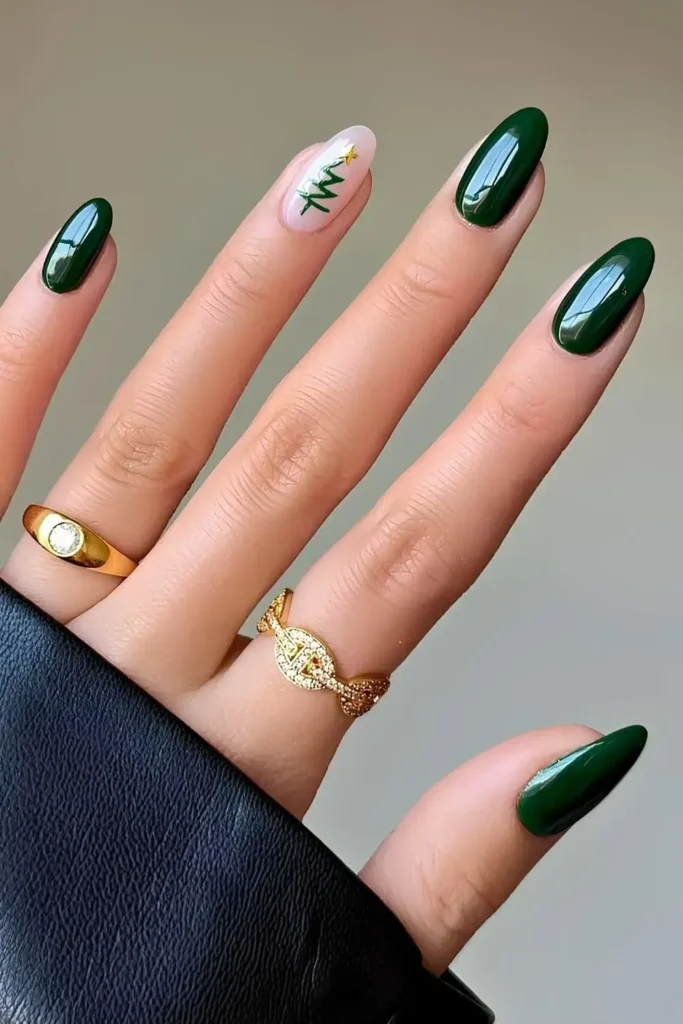
Paint most nails a deep Dark Green. On one sheer accent nail, paint a simple Christmas tree detail. You can easily DIY this—you literally just need a few zigzag lines to create a tree shape. Artistic range unlocked, in five minutes flat!
White Winter Manicure

Paint most of your nails clean White. Add one sheer accent nail featuring crisp, diagonal candy cane stripes. You did the bare minimum and it looks chic and expensive. That’s our favorite combo.
Candy Cane Heart Nails
A sweet and playful accent. Use a milky base with simple Red French Tips, and then paint a tiny candy cane heart on one accent nail. It’s festive without being overwhelming—perfect for your cute-girlie winter era.
Shimmery Finish Nails
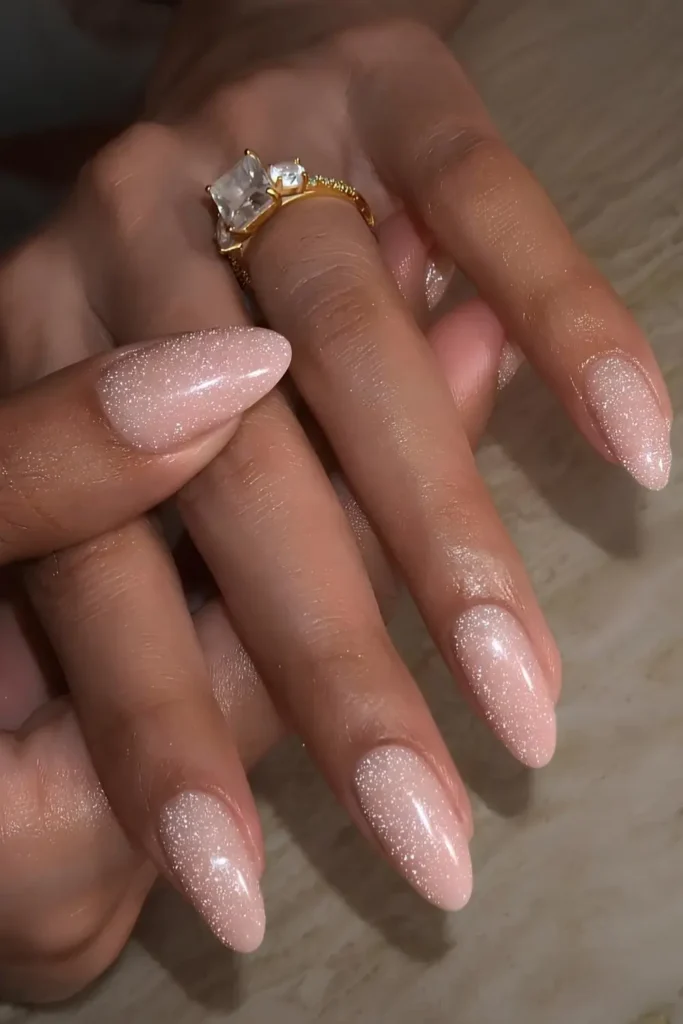
Start with a skin-tone neutral base, then apply a sparkly topcoat. Or, even easier, just grab a polish that already has shimmer built-in! Ten minutes and you’re sparkling. Now go eat some cookies, you lazy genius.
Dusty Pink Nails
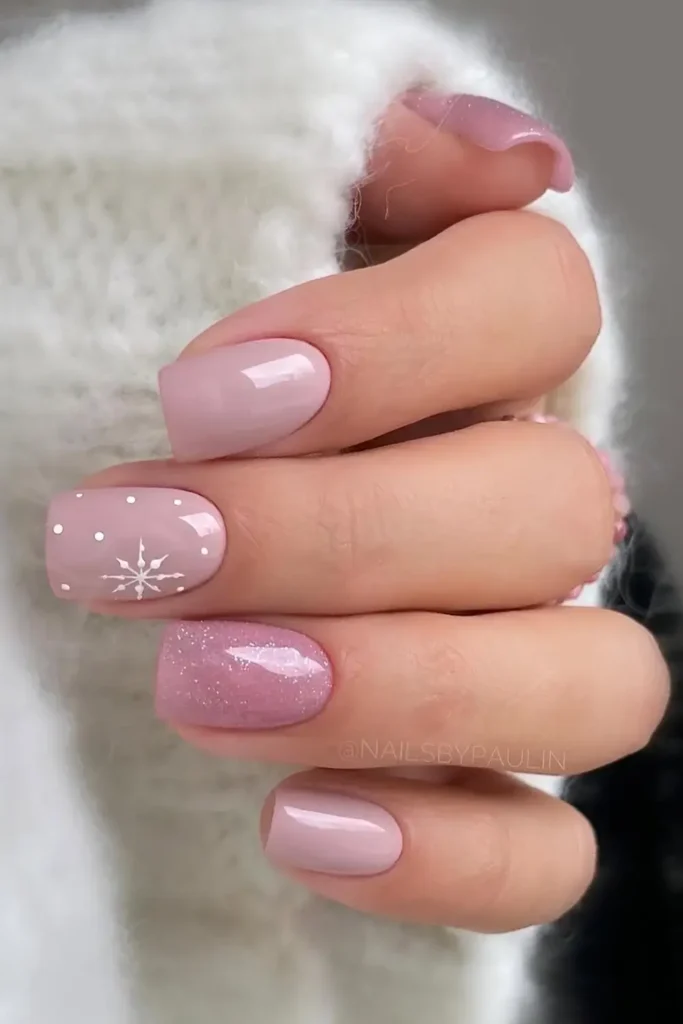
Take your regular pink manicure and make it seasonal! Use a dusty pink base, add a shimmer topcoat on one nail, and place a simple white snowflake and micro dots on another. Efficient queen behavior!
Minimalist Snowflake Nails
Use a neutral pink base and place minimalist snowflake art just in the corner of each nail. This is way simpler than it looks—paint some dots, connect them with straight lines—and you’ve made a snowflake!
Silver Glitter French Tips
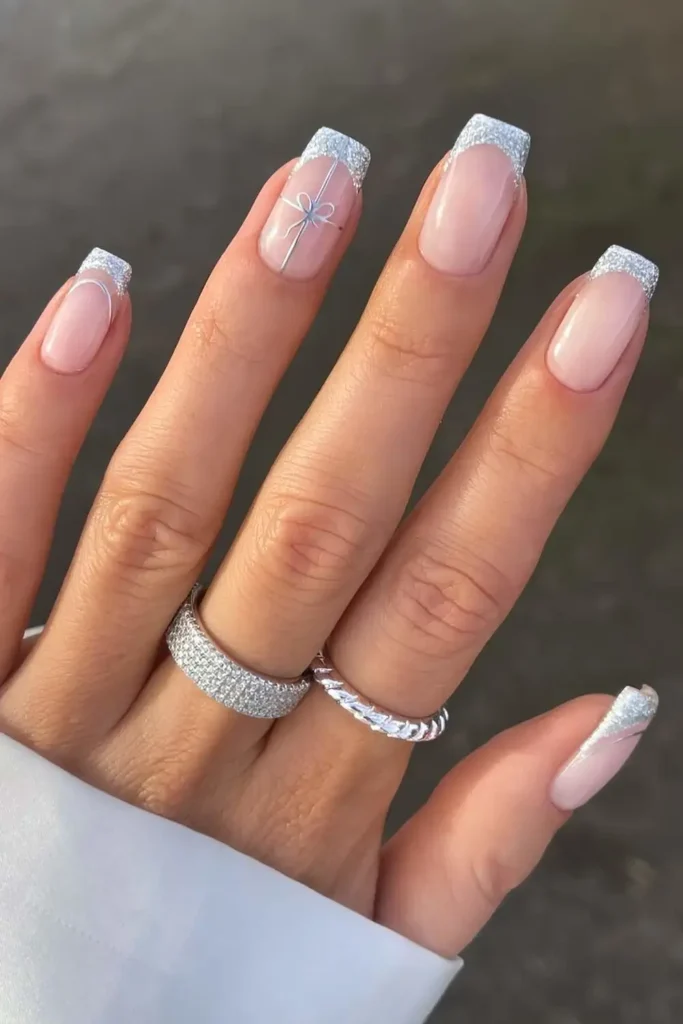
Yes, you can be both simple AND sparkly! Swap your usual white French tips for a dazzling Silver Glitter French. Keep it simple by adding a single, easy gift bow as your accent.
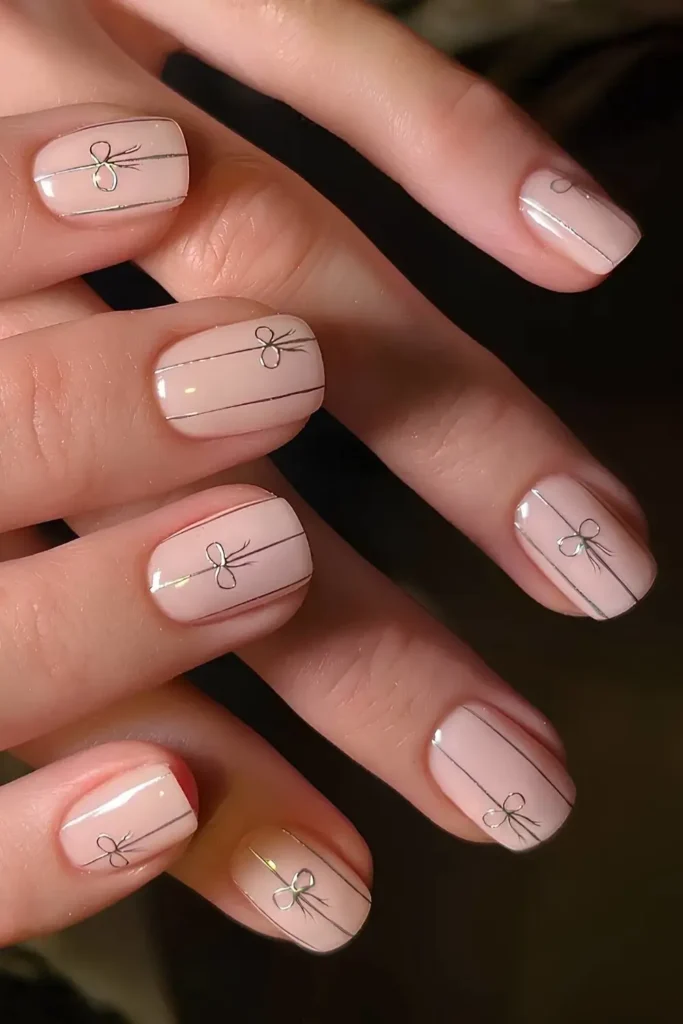
Bow and Polka Dot Nails
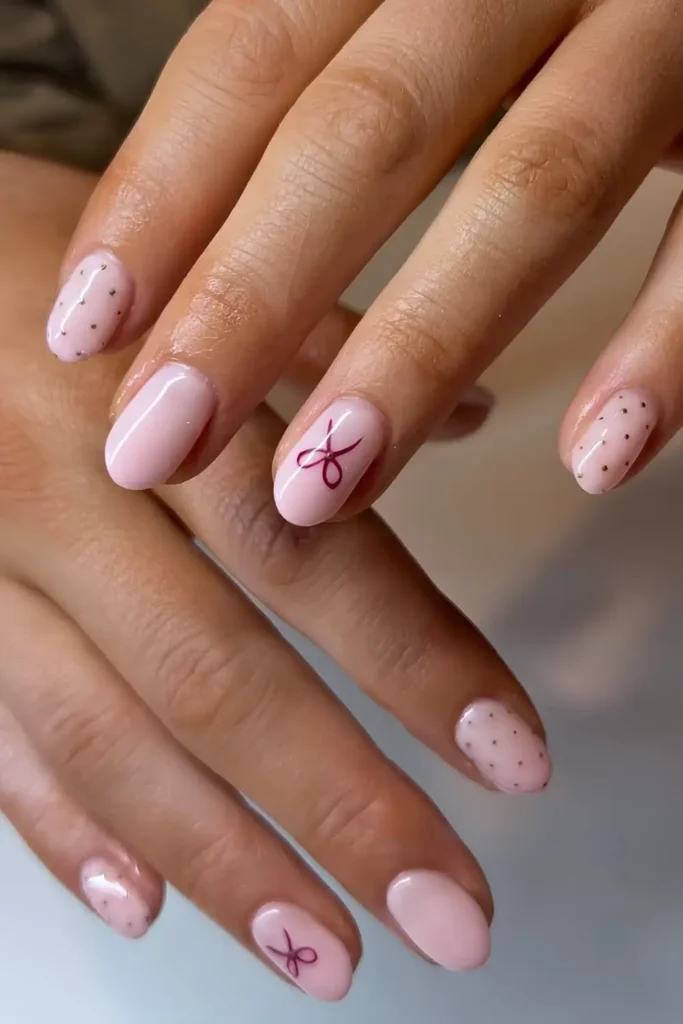
Use a milky pink base with the coquette trend: add bow and polka dot accents. This is perfect for when you want to participate in the holiday fun but aren’t dressing up as an elf at the company party.
Dark Green Nails
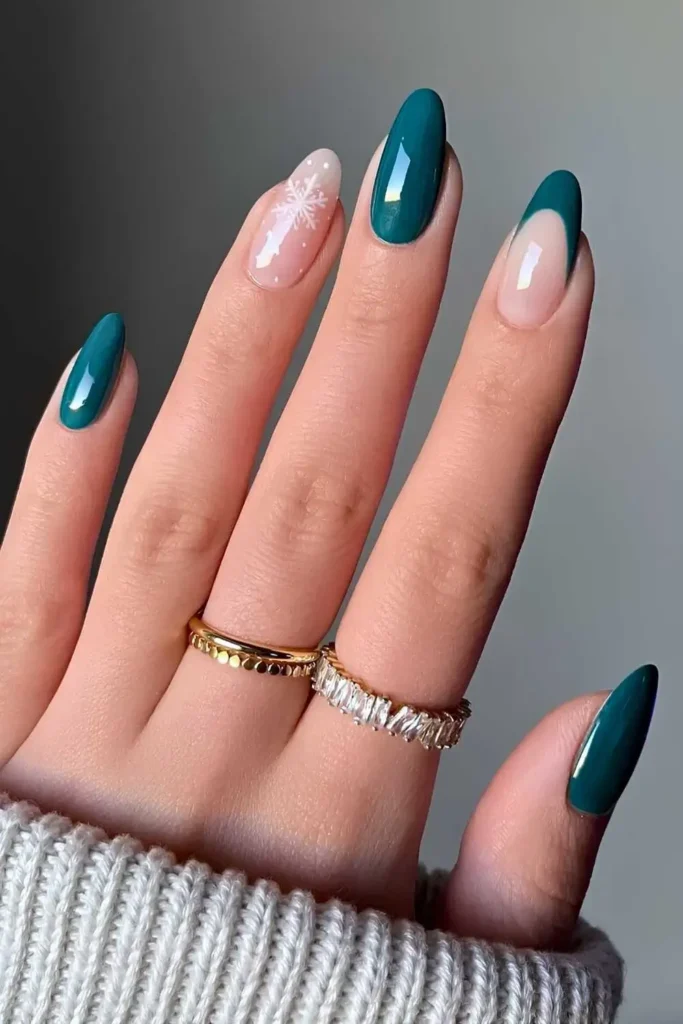
Keep the design simple: Dark Green split between solid nails and French tips. One feature nail gets snow-inspired art. The gorgeous dark green color is doing 90% of the work here, which is the ideal ratio!
Neutral-Tone Manicure
For everyone who sees a red and green mani and feels nothing. Paint most nails beige, add one gold glitter nail, and one snowflake accent. It’s your beloved neutral style, but perfectly holiday-adjacent.
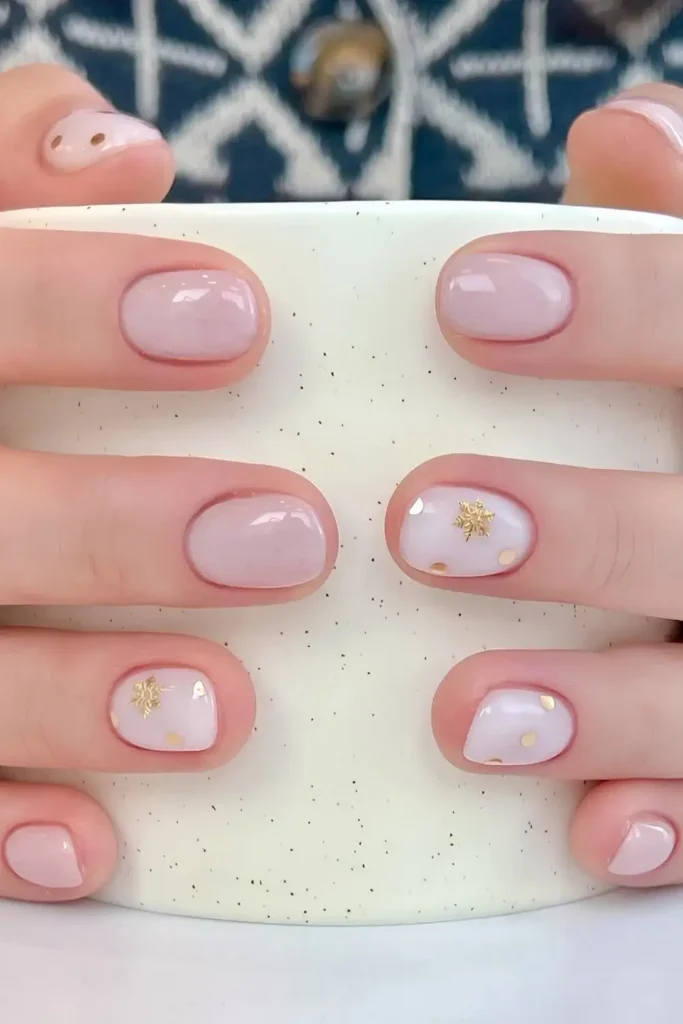
Nude Christmas Nail Designs
If you love that my-nails-but-better look, the simplest way to make it holiday-ready is to embellish an accent nail with a small snowflake and tiny gold or silver foil bits. Chic and understated.
Holiday Ombre Nails
Use a clean White-to-pink ombré gradient (or white to nude) and add simple white snowflakes on each nail. This pays off because the result is incredibly clean, subtle, and elegant.
Peppermint Swirl Nails
This is the candy cane look, but dialed back a notch. Use classic Red and White Christmas Nails French Tips on most nails, and add just one accent nail with a clean white peppermint swirl. A little detail is truly all you need.
Green and White Nails
Paint most of your set a simple Dark Green. Use two white accent nails and place tiny green micro dots at the cuticle. This is the perfect Christmas mani when you’re low on time but still want a cute look.
Chrome Line Art Nails
Want a cool graphic moment without sitting in the salon chair for three hours? Use a milky white base, then add thin, sleek chromed stripes and a teeny bow on every nail. High-fashion, low-effort.
Pink and White Nails
Rotate between pale pink and white polishes. On the white nails, simply slap on gold snowflake decals and tiny confetti bits, then topcoat. Decals are the ultimate shortcut, and we are not above them!
Holiday Skittle Nail Set
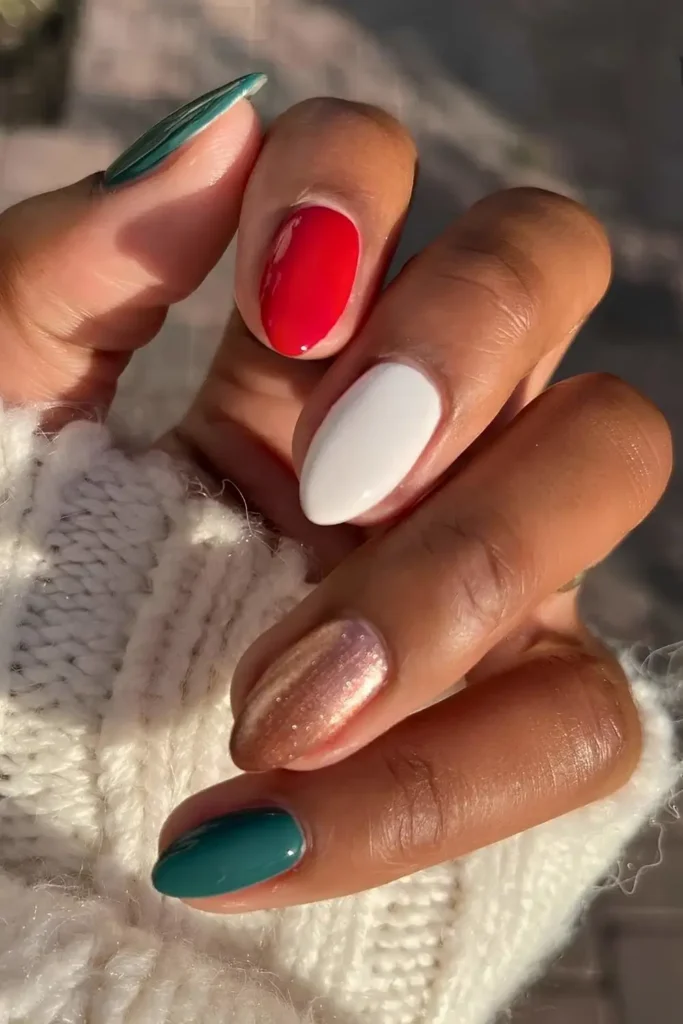
This one looks like effort was made but it’s literally just painting each nail a different color—Green, Red, White, and one Gold Glitter nail as the finishing touch. The mixed colors do all the work!
Red and Gold Nails
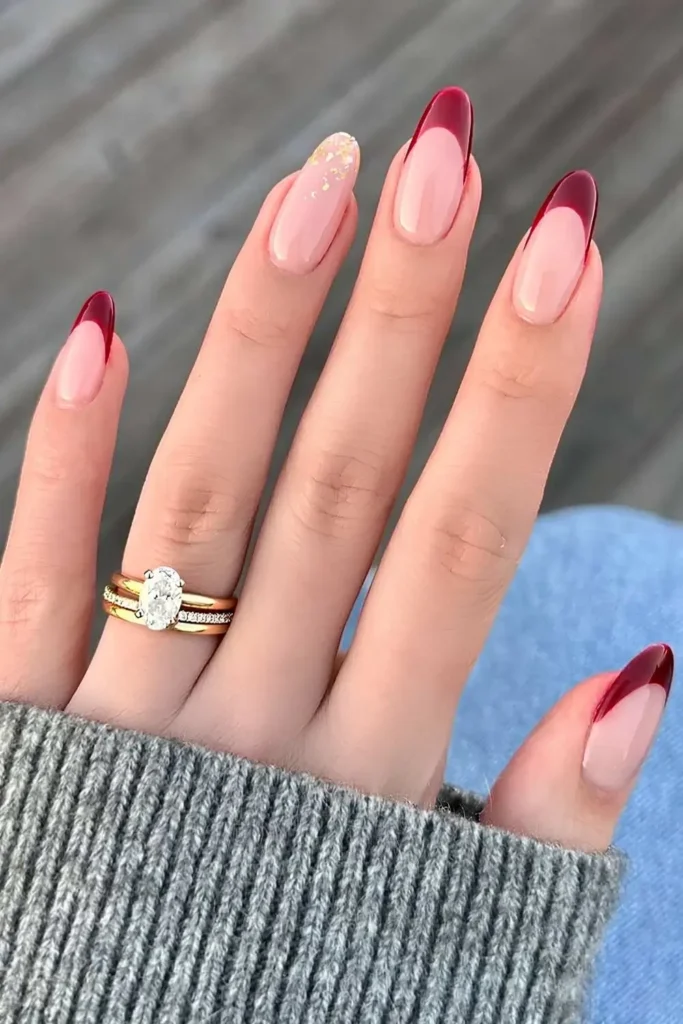
Feeling the rich aunt Christmas energy? Apply dark red smile lines for the French tip, and then use one sheer feature nail with teeny, delicate gold foil bits placed only at the tip. Simple, elegant, and looks like money.
Classic Black Manicure
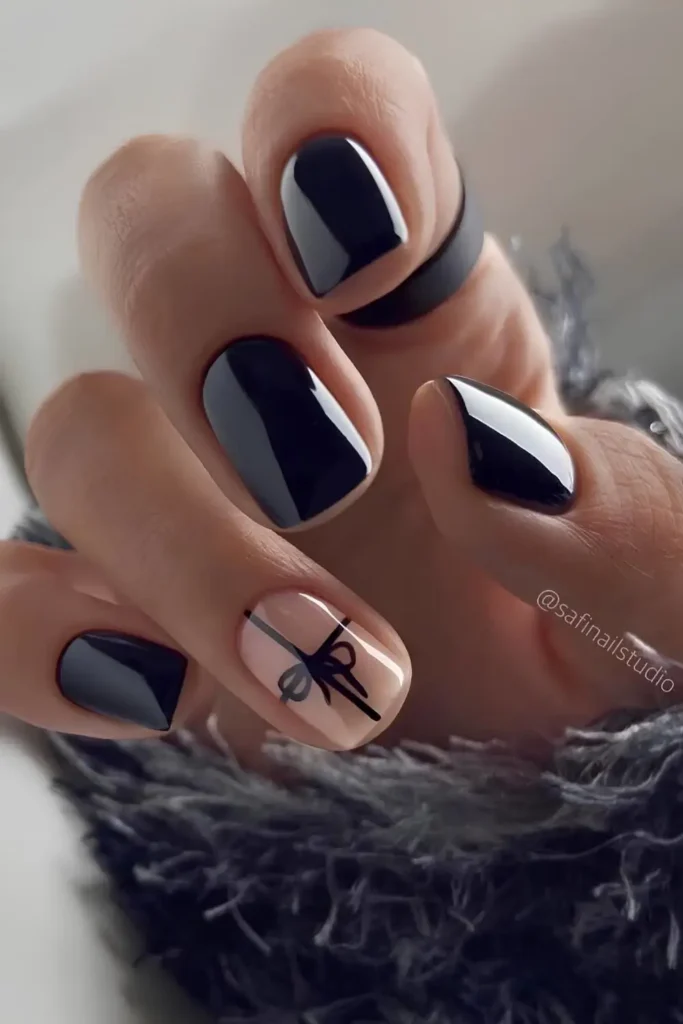
Not willing to give up your black polish just because it’s December? No problem! Add one sheer accent nail with simple black gift bow art. You’re holiday-ready without abandoning your personal brand.
Conclusion
So, there you have it—your ultimate guide to 25 gorgeous Simple Christmas Nail Designs! We’ve shared options that are all about minimum effort and maximum festive impact, covering cozy textures, glamorous chrome, and chic neutral looks. Whether you’re DIY-ing at home or making a quick salon stop, these easy ideas prove you don’t need hours to look stunning. Choose your favorite, grab your polish, and enjoy a quick glow-up this holiday season!
5 Tips for Christmas Nail Designs
- Use a fine tip dotting tool or even a ballpoint pen to create perfectly uniform micro dots for easy snow or confetti art.
- If you can’t freehand a snowflake, use cheap holiday stickers or decals—they are the fastest path to simple success!
- Choose one dominant color (like dark green) and use a neutral (like white or gold) only for tiny accents to keep the design clean.
- A Skittle Set (a different color on each nail, e.g., red, white, green, gold) is the quickest way to look festive without any actual art.
- Always use a quick-dry topcoat to seal your simple designs and prevent smudging, reducing your total manicure time.